Developing with the Moddable SDK on Windows
Windows is the development platform used by embedded software developers simply because many semiconductor companies only provide their development and debugging tools for Windows. Many large companies require their employees to use a common operating system and, more often than not, that platform is Windows. And, of course, many software engineers simply prefer to do their development on Windows. Moddable believes in choice for developers of embedded devices, just as we believe in choice for users of the product they create. We have long worked to make our development tools available for use on macOS, Windows, and Linux. This blog post provides an overview of developing with the Moddable SDK on Windows and highlights recent work that brings development on Windows on par with macOS.
At Moddable, we develop primarily on macOS, but recognize that Windows and Linux are important development platforms for many commercial, hobbyist and student developers. To ensure that embedded developers can easily work with the Moddable SDK on Windows hosts, we’ve built a suite of professional quality tools and modules for Windows that parallel the experience on macOS.
Note: The Moddable SDK requires Windows 7 Pro SP1 or newer and Microsoft Visual Studio Community 2017 or newer. Refer to our Getting Started document for Windows host environment setup instructions.
Tools
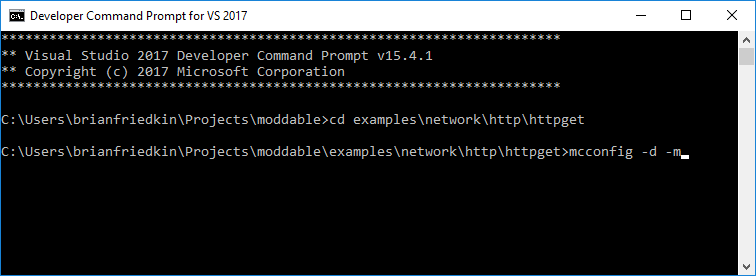
Moddable builds are hosted from the Visual Studio Developer Command Prompt. This is the only command line shell needed for Moddable development. The same mcconfig command line options are used on macOS and Linux platforms.
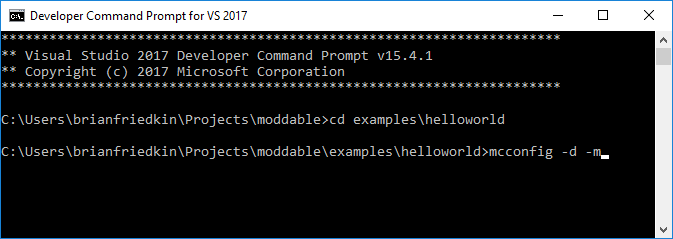
Moddable tools are written in JavaScript and C, and run on the command line. Because the majority of source code is the same for all development hosts, the Moddable tools run the same way on all supported development hosts.
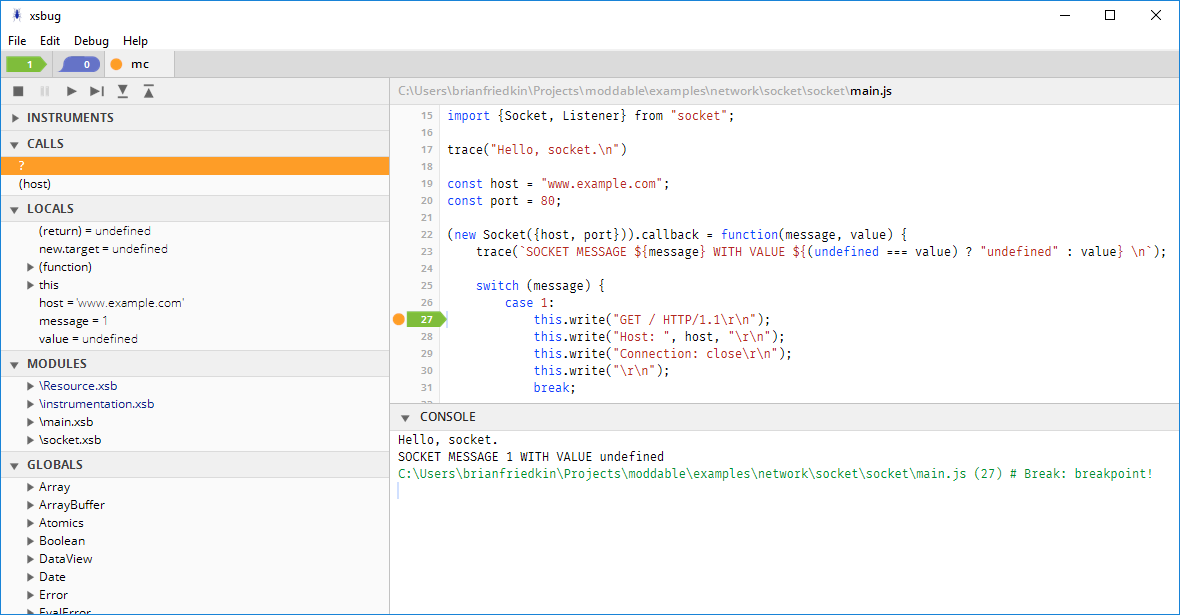
The command line build automatically connects to the target device and establishes a serial connection for debugging. No additional steps are necessary. The xsbug debugger provides source level debugging of JavaScript apps and modules on Windows.
Modules
The Moddable SDK runtime is designed to deliver efficient, robust software on microcontrollers. This runtime is a collection of modules that provide JavaScript APIs to work with embedded platform features, including screen drivers, network sockets and protocols, GPIO, file system, and timers. In some cases the JavaScript APIs are implemented in native code using platform-specific APIs. To support embedded development on Windows hosts using the Moddable SDK, we provide Win32 and macOS implementations of the following modules:
- Timer - One-shot and repeating timers are routinely used to poll sensors and perform other time-based tasks.
- File - Access to the native file system.
- Preference - Storing persistent data across device power cycles.
- Socket - Core TCP/IP and UDP socket support. The Socket class provides the foundation for all the networking protocols in the Moddable SDK. Windows developers can therefore build apps that communicate with cloud-based services.
- Net - The Net class includes APIs for host name resolution and accessors to retrieve the device MAC address, IP address, connected SSID, and other network properties.
- audioout - A multi-stream audio mixer with both uncompressed and IMA compressed audio inputs.
Our Commodetto graphics library, Piu user interface framework and desktop simulator all run on Windows, providing Windows embedded developers the tools needed to efficiently prototype and build engaging applications for color touch screens.
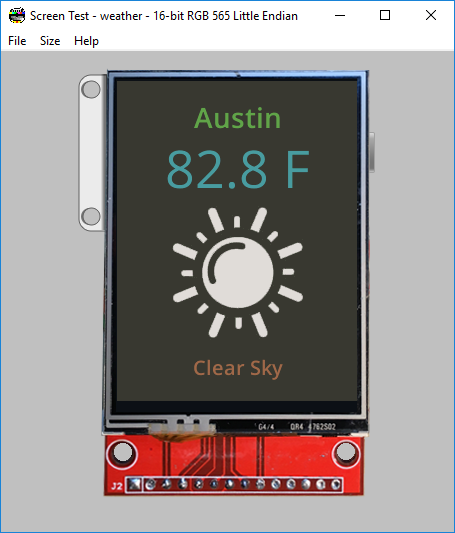
Windows runtime support in the Moddable SDK allows developers to build complete applications without access to hardware. The example below shows how the Sharp qm1h0p0073 temperature and humidity sensor can easily be simulated on Windows (or any desktop platform).
The ga1auv100wp sensor module is built by the application manifest.json file for the ESP8266, Windows and macOS targets. Notice that the simulated desktop module implementation is shared between Windows and macOS:
"platforms": {
    "esp": {
        "modules": {
            "*": [
                "$(MODDABLE)/modules/drivers/ga1auv100wp/*",
                "$(MODULES)/pins/i2c/esp/*",
            ],
            "pins/i2c": "$(MODULES)/pins/i2c/i2c",
            "pins/smbus": "$(MODULES)/pins/smbus/smbus",
        }
    },
    "win": {
        "modules": {
            "*": [
                "$(MODULES)/base/timer/win/*",
                "./simulator/ga1auv100wp/*",
            ],
        },
    },
    "mac": {
        "modules": {
            "*": [
                "$(MODULES)/base/timer/mac/*",
                "./simulator/ga1auv100wp/*",
            ],
        },
    }
}
The sensor module sample function for the ESP8266 target reads the temperature and humidity over I2C:
class QM1H0P0073 extends I2C {
    ...
    sample() {
        this.write();               // measurement request (latch new readings)
        Timer.delay(50);
        let bytes = this.read(4);   // data fetch (read latched measurements)
        return {
            humidity: ((((bytes[0] << 8) | bytes[1]) >> 2) / 16384) * 100,
            temperature: (((((bytes[2] << 8) | bytes[3]) >> 2) / 16384) * 165) - 40
        }
    }
}
The sample function implemented by the simulator target simply ramps the temperature and humidity values on each call:
let temperature = 100;
let humidity = 0;

class QM1H0P0073 {
    ...
    sample() {
        let result = { humidity, temperature };
        temperature -= 1;
        if (temperature == 0)
            temperature = 100;
        humidity += 1;
        if (humidity == 100)
            humidity = 0;
        return result;
    }
}
Because the device and simulator sensor modules provide the same APIs, the host application runs on all platforms without any changes:
import Timer from "timer";
import QM1H0P0073 from "qm1h0p0073";

let sensor = new QM1H0P0073();
Timer.repeat(() => {
    let sample = sensor.sample();
    trace(`temperature: ${sample.temperature}, humidity: ${sample.humidity}\n`);
}, 100);
Debugging Native Code on Windows
XS in C, the C interface to the runtime of our XS JavaScript engine, allows developers to run native code from JavaScript modules. This way developers can integrate existing native code with Moddable modules and apps. The xsbug debugger provides source level debugging for JavaScript modules and apps. Moddable developers on Windows can combine xsbug with the Visual Studio debugger to debug both native C and JavaScript code simultaneously. This way the entire stack can be debugged using familiar tools. This section provides a walk-through, using the httpget example app.
Build the Moddable tools from the Visual Studio Developer Command Prompt:
cd %MODDABLE%\build\makefiles\win
build
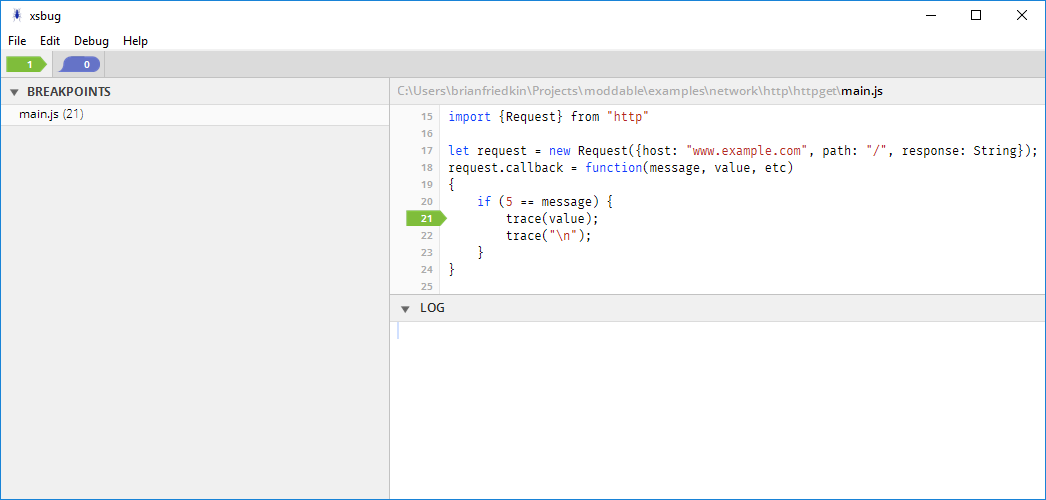
Open the xsbug JavaScript source level debugger from the command prompt:
start xsbug.exe
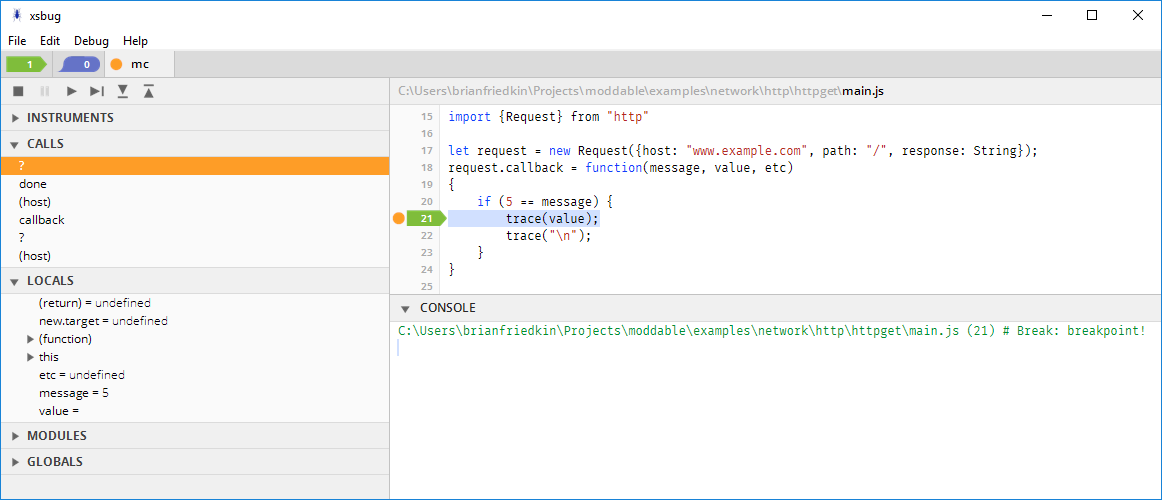
From the xsbug "File > Open File..." menu item, open the httpget\main.js file. The source file can also be drag and dropped onto the xsbug window from Windows Explorer. Set a breakpoint in the JavaScript source.
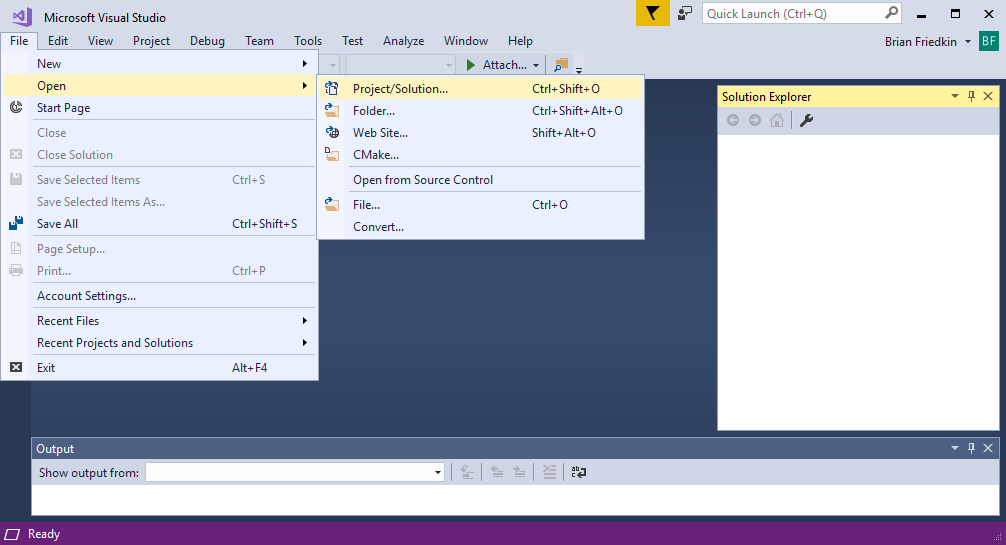
Launch Visual Studio and chose "Open > Project/Solution..." from the "File" menu.
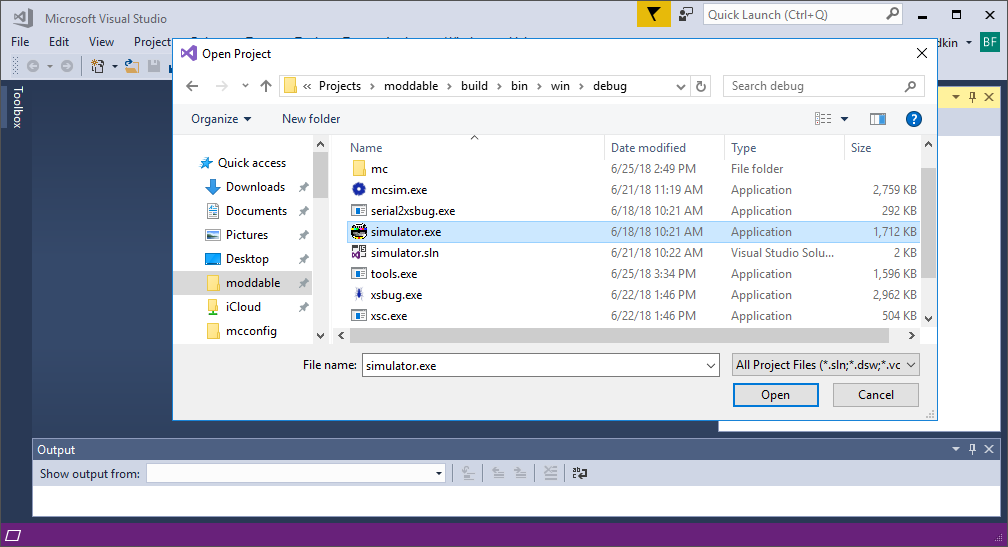
Navigate to and open the Moddable desktop simulator simulator.exe application in the %MODDABLE%\build\win\debug directory.
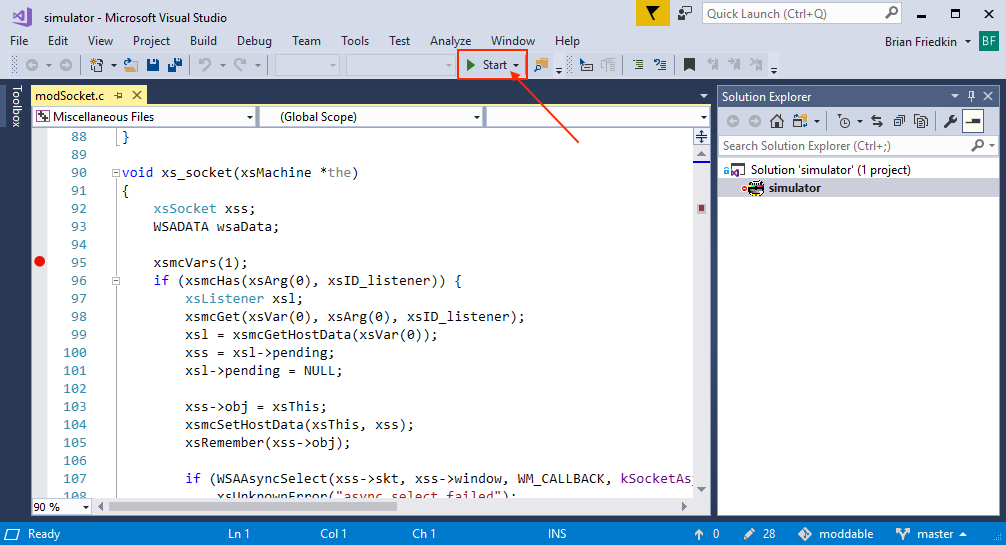
A new solution will be created for the simulator application. Then from the File menu, open the Windows C code implementation of the Socket class, modSocket.c, located in the %MODDABLE%\modules\network\socket\win directory. Set a breakpoint at the top of the xs_socket function (the module's constructor) and press the start button. The simulator will launch to an empty screen. Note that the breakpoint may display as a hollow circle until the example application is loaded and launched.
Build the httpget example application from the command line. The application will launch and the native code breakpoint triggers. From here the Moddable socket native code can be debugged in Visual Studio.

In Visual Studio, tap the "Continue" button to resume the example app. The xsbug debugger window automatically moves to the front and the JavaScript breakpoint triggers.
Conclusion
The Windows development platform is widely used for embedded software development. Our Windows tools and modules are designed to "just work" on Windows, allowing developers to focus on the embedded application. Because developers should have a choice, we invest in making our tools available on macOS and Linux as well. The tools and JavaScript APIs are the same across all development hosts, allowing engineering team members that use different development hosts to work much more efficiently together.