Copyright 2016-2023 Moddable Tech, Inc.
Revised: September 30, 2023
This document provides a guide to building apps for the ESP32 line of SoCs from Espressif. The Moddable SDK supports ESP32, ESP32-S2, ESP32-S3, ESP32-C3, ESP32-C6, and ESP32-H2.
Before you can build applications, you need to:
- Install the Moddable SDK and build its tools
- Install the required drivers and development tools for the ESP32 platform
The instructions below will have you verify your setup by running the helloworld example on your device using mcconfig, a command line tool that builds and runs Moddable applications.
See the Tools documentation for more information about mcconfig
When building with mcconfig, you specify your device target by providing the platform identifier of your development board to the -p argument. For example, use the following command to build for Moddable Two:
mcconfig -d -m -p esp32/moddable_two
A list of available ESP32 and ESP32-S2 subplatforms and their platform identifiers is provided in the Platforms section below.
ESP32 has the following features:
- 240 MHz processor
- Dual core
- Wi-Fi
- BLE
- 520 KB RAM
- 4 MB flash
The Moddable SDK supports many devices built on ESP32. The following table lists each device, its platform identifier, a list of key features specific to the device, and links to additional resources.
| Name |
Platform identifier |
Key features |
Links |
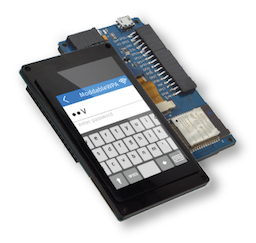
Moddable Two |
esp32/moddable_two
simulator/moddable_two
|
2.4" IPS display
240 x 320 QVGA
16-bit color
Capacitive touch
20 External pins |
Moddable Two developer guide
Moddable product page
|

Node MCU ESP32 |
esp32/nodemcu |
|
|

M5Stack |
esp32/m5stack
esp32/m5stack_core2
|
1.8" LCD display
320 x 240 QVGA
16-bit color
Audio playback
Accelerometer
NeoPixels |
Product page |

M5Stack Fire |
esp32/m5stack_fire |
1.8" LCD display
320 x 240 QVGA
16-bit color
Audio playback
Accelerometer
NeoPixels |
Product page |

M5Stick C |
esp32/m5stick_c
simulator/m5stick_c
|
0.96" LCD display
80 x 160
16-bit color
IMU
Microphone |
Product page |
M5Stick C PLUS |
esp32/m5stick_cplus |
1.14" LCD display
135 x 240
16-bit color
IMU
Microphone |
Product page |

M5Atom |
esp32/m5atom_echo
esp32/m5atom_lite
esp32/m5atom_matrix
|
5 x 5 RGB LED matrix panel
MPU6886 Inertial Sensor
6 External Pins |
Product page |
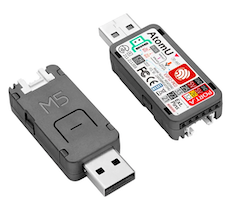
M5AtomU |
esp32/m5atom_u |
Neopixel, 1 button
Microphone
6 External Pins |
Product page |
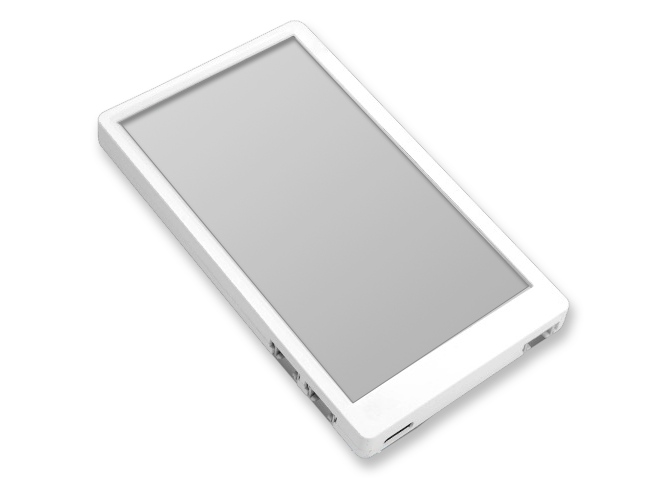
M5 Paper |
esp32/m5paper
simulator/m5paper
|
960 x 540 ePaper touch screen
Temperature sensor |
Product page
Moddable SDK docs
|
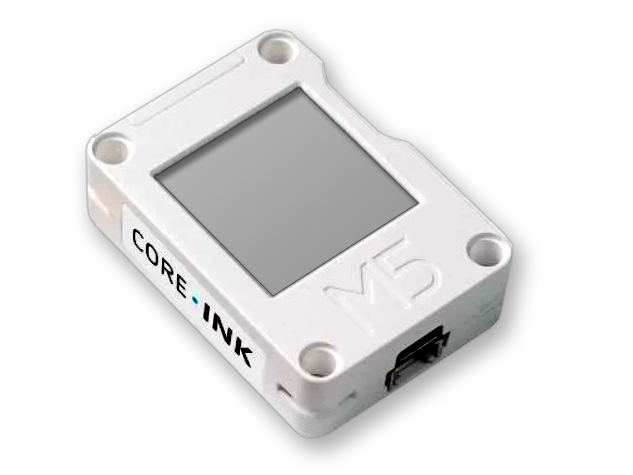
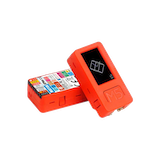
M5Core Ink |
esp32/m5core_ink |
200 x 200 ePaper display
Buzzer
Dial |
Product page
Moddable SDK docs
|
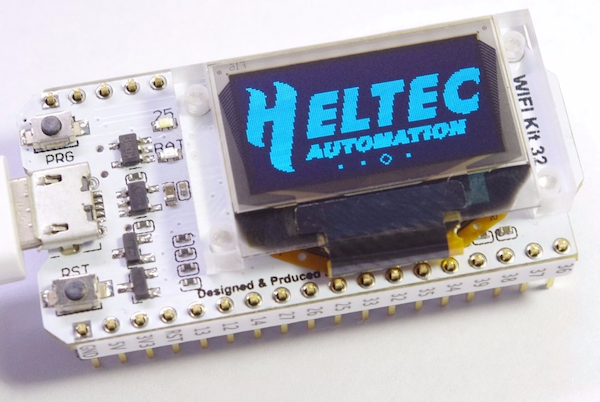
Heltec WiFi Kit 32 |
esp32/heltec_wifi_kit_32 |
128 x 64 OLED display |
Product page |
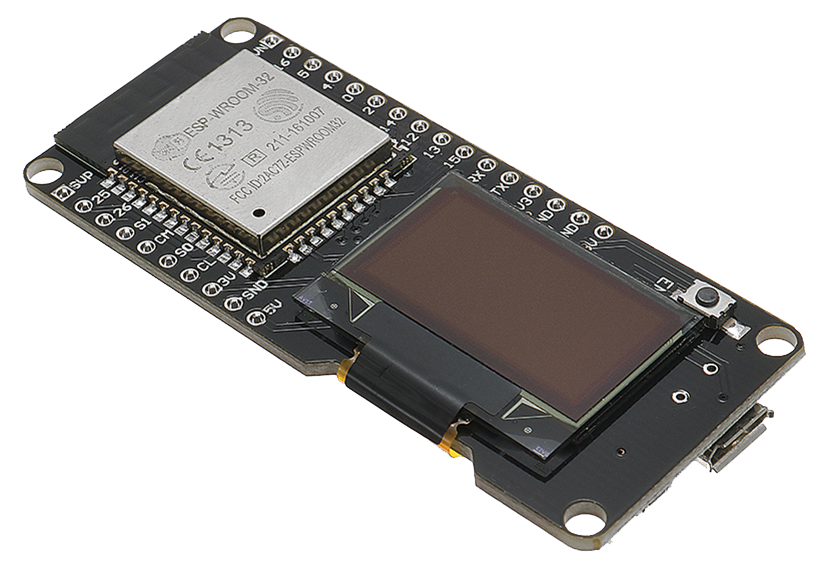
Wemos OLED Lolin32 |
esp32/wemos_oled_lolin32 |
128 x 64 OLED display
No built-in LED's |
Additional information |

SparkFun Thing |
esp32/esp32_thing |
|
Product page |

SparkFun Thing Plus |
esp32/esp32_thing_plus |
|
Product page |

ESP32 WRover Kit |
esp32/wrover_kit |
|
Product page |

Wireless Tag WT32-ETH01 |
esp32/wt32_eth01 |
Built-in Ethernet |
Product page |
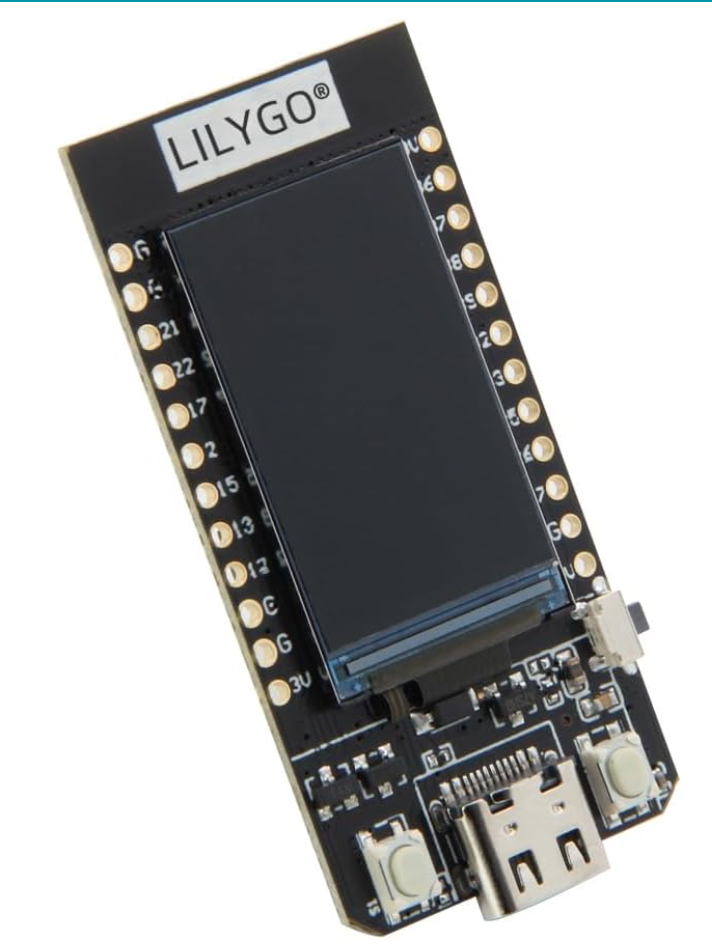
Lilygo TTGO |
esp32/lilygo_ttgo |
135 x 240 IPS display
Button |
Product page |
| Moddable Zero |
esp32/moddable_zero |
|
Wiring guide |
ESP32-S2 has the following features:
- 240 MHz processor
- Wi-Fi
- 320 KB RAM
- External SRAM support
- 4 MB flash on popular modules
The Moddable SDK supports two ESP32-S2 development kits from Espressif. The following table lists each device, its platform identifier, a list of key features specific to the device, and links to additional resources.
| Name |
Platform identifier |
Key features |
Links |

Kaluga |
esp32/kaluga |
3.2" LCD display
320 x 240 QVGA
16-bit color
2 MB SRAM
Speaker and Audio Playback
Touch Pad Panel
NeoPixel LED |
Moddable blog post
Product page
|

Saola
(WROOM & WROVER versions) |
esp32/saola_wroom
esp32/saola_wrover
|
NeoPixel LED
2 MB SRAM (WROVER version only) |
Moddable blog post
Product page
|

Adafruit
QT Py ESP32-S2 |
esp32/qtpys2 |
Neopixel, 1 button, STEMMA/QWIIC |
Product page |
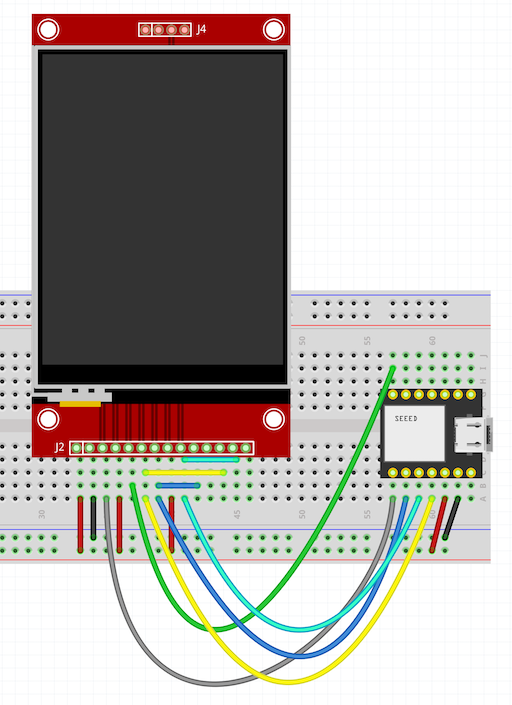
ili9341 |
esp32/qtpys2_ili9341 |
ili9341 QVGA display
320 x 240
16-bit color |
Wiring Guide |
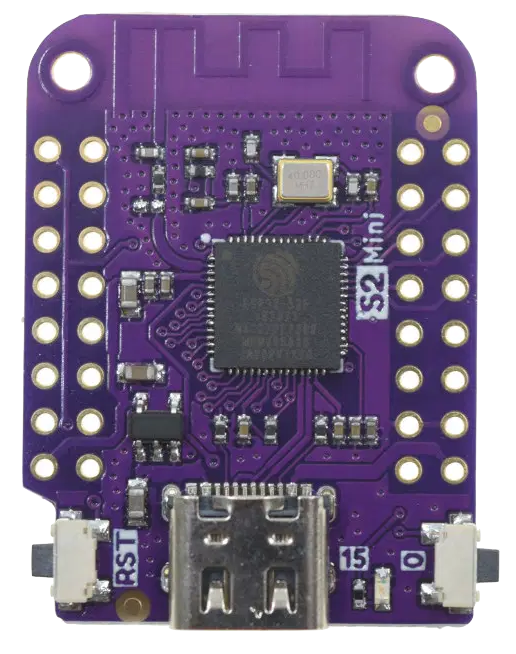
Lolin
S2 Mini |
esp32/lolin_s2mini |
1 button |
Product guide |
ESP32-S3 is the successor to the original ESP32. It has the following features:
- 240 MHz processor (two cores)
- Wi-Fi
- BLE
- 512 KB RAM
- External PSRAM support
- 8 MB flash on popular modules
The Moddable SDK supports devices built on ESP32-S3. The following table lists each device, its platform identifier, a list of key features specific to the device, and links to additional resources.
| Name |
Platform identifier |
Key features |
Links |

ESP32-S3-DevKitC-1-N8 |
esp32/esp32s3 |
|
Product page |
Adafruit QT Py ESP32-S3 |
esp32/qtpys3 |
Neopixel, 1 button, STEMMA/QWIIC |
Product page |
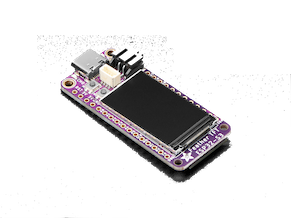
Adafruit ESP32-S3 TFT Feather |
esp32/feather_s3_tft |
1.14" TFT display
240 x 135 16-bit color |
Product page |

AtomS3 |
esp32/m5atom_s3 |
0.85" IPS display
128 x 128 16-bit color
1 button
IMU |
Product page |
AtomS3 Lite |
esp32/m5atom_s3_lite |
Neopixel, 1 button |
Product page |
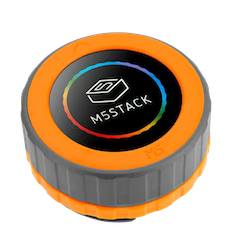
M5Dial |
esp32/m5dial |
1.28" IPS 240×240 Round Display, Touch, 1 button,Rotary Encoder, RTC |
Product page |
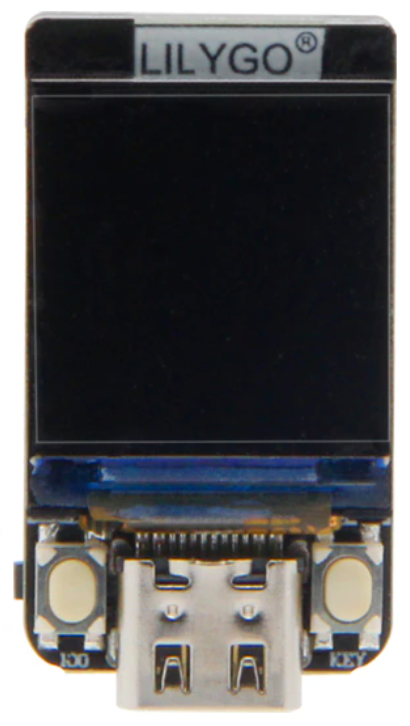
Lilygo T-QT ESP32-S3 |
esp32/lilygo_t_qt |
0.85" LCD display
128 x 128 16 bit color
2 buttons
Qwiic connector |
Product page |
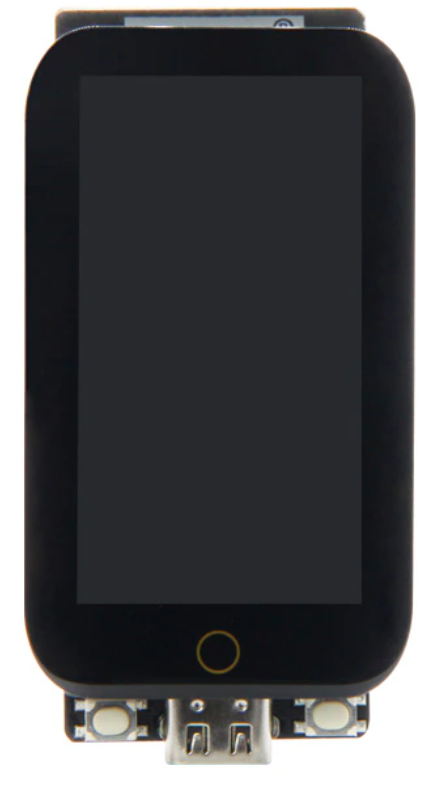
Lilygo T-Display-S3 |
esp32/lilygo_tdisplay_s3 |
1.9" LCD display
170 x 320 16 bit color
8-bit parallel display
Touch
2 buttons
Qwiic connector
|
Product page |

Seeed Studio
XIAO ESP32S3 |
esp32/xiao_esp32s3 |
1 button |
Product page |
ili9341 |
esp32/qtpys3_ili9341
esp32/xiao_esp32s3_ili9341
|
ili9341 QVGA display
320 x 240
16-bit color |
Wiring Guide |
ESP32-C3 has the following features:
- 160 MHz RISC-V MCU
- Wi-Fi
- BLE
- 400 KB RAM
- 4 MB flash on popular modules
The Moddable SDK supports three ESP32-C3 development kits:
| Name |
Platform identifier |
Key features |
Links |

ESP32-C3-DevKitM-1 |
esp32/esp32c3 |
|
Product page |
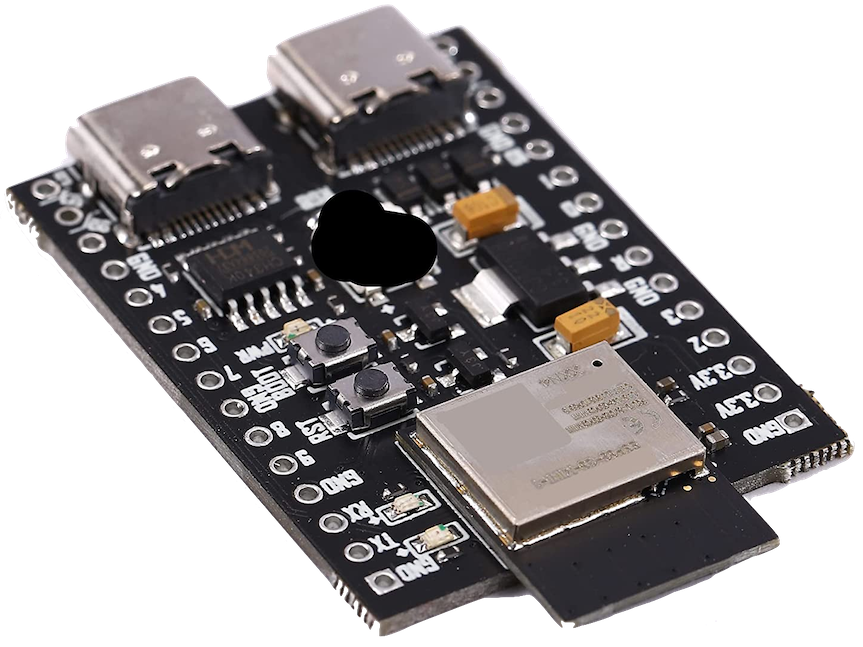
ESP32 C3 DevKit clone |
esp32/esp32c3_cdc |
|
Product page |
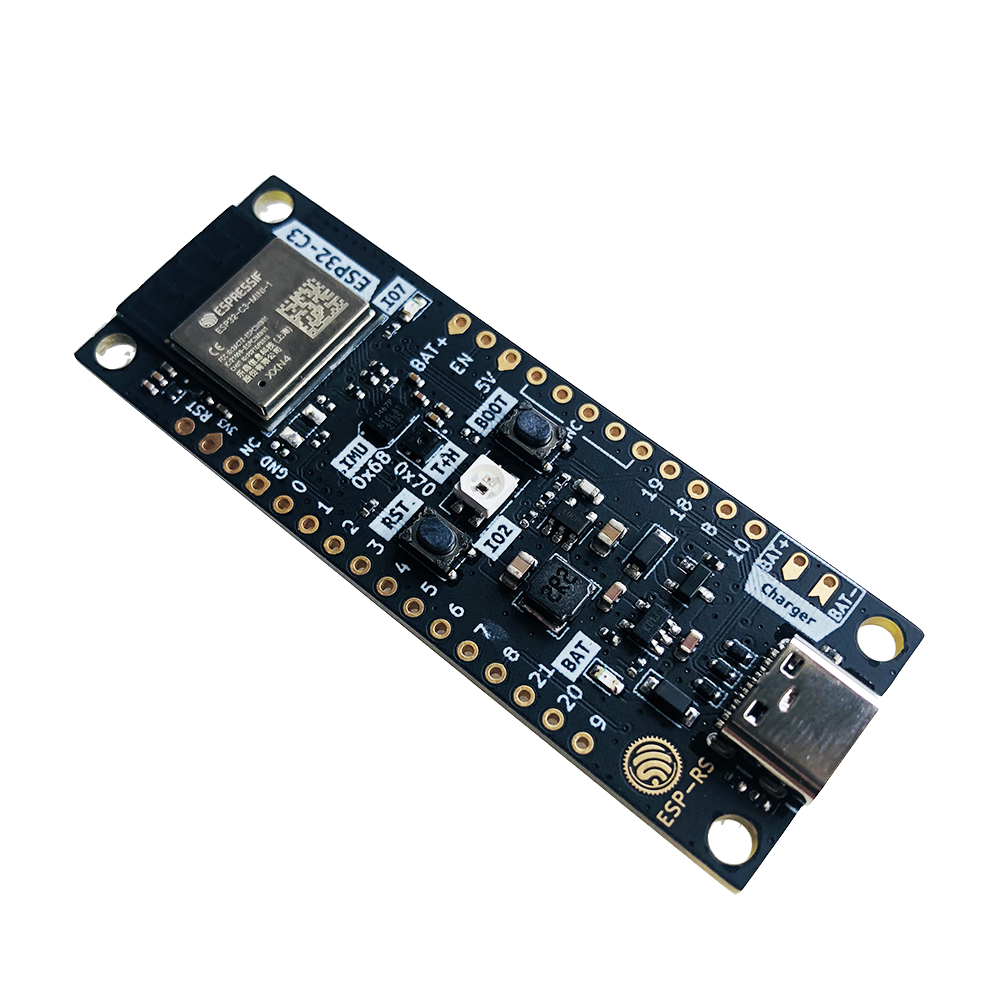
ESP32-C3-DevKit-RUST-1 |
esp32/c3_devkit_rust |
|
Product page |
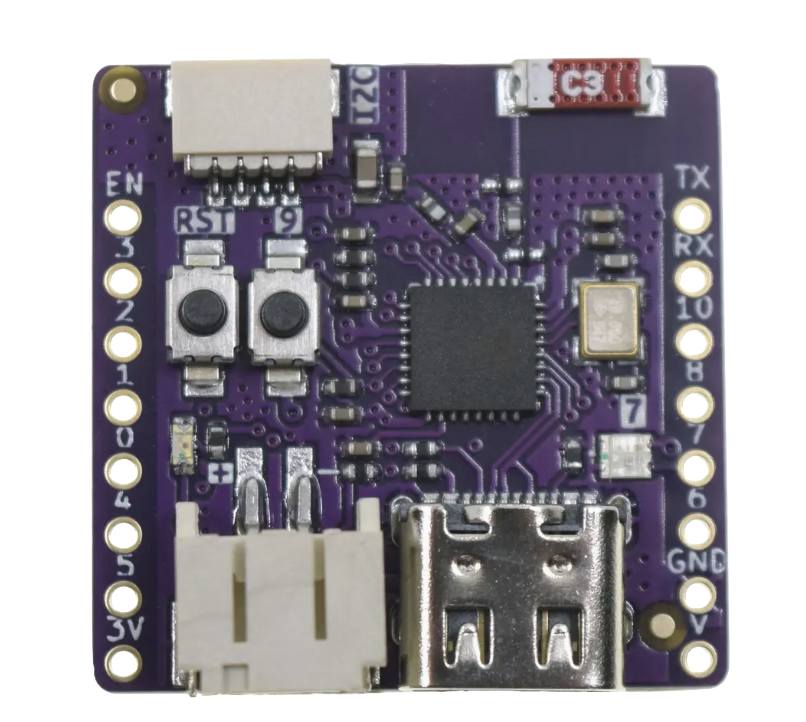
Seeed Studio
XIAO ESP32C3 |
esp32/xiao_esp32c3 |
1 button |
Product page |
Adafruit
QT Py ESP32-C3 |
esp32/qtpyc3 |
Neopixel, 1 button, STEMMA/QWIIC |
Product page |
AI Thinker ESP-C3-32S-Kit
(1 MB and 2 MB versions) |
esp32/c3_32s_kit
esp32/c3_32s_kit_2m
|
RGB LED |
Product specification |
ili9341 |
esp32/qtpyc3_ili9341
esp32/xiao_esp32c3_ili9341
|
ili9341 QVGA display
320 x 240
16-bit color |
Wiring Guide |
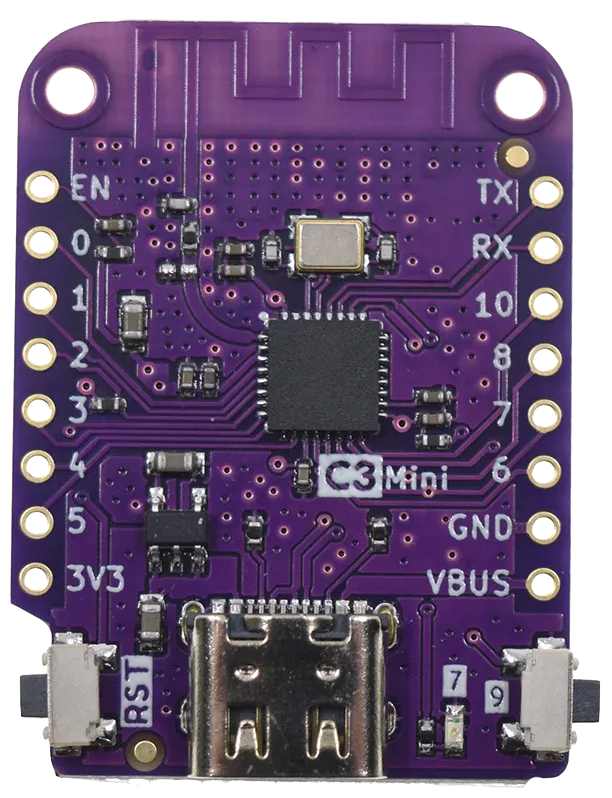
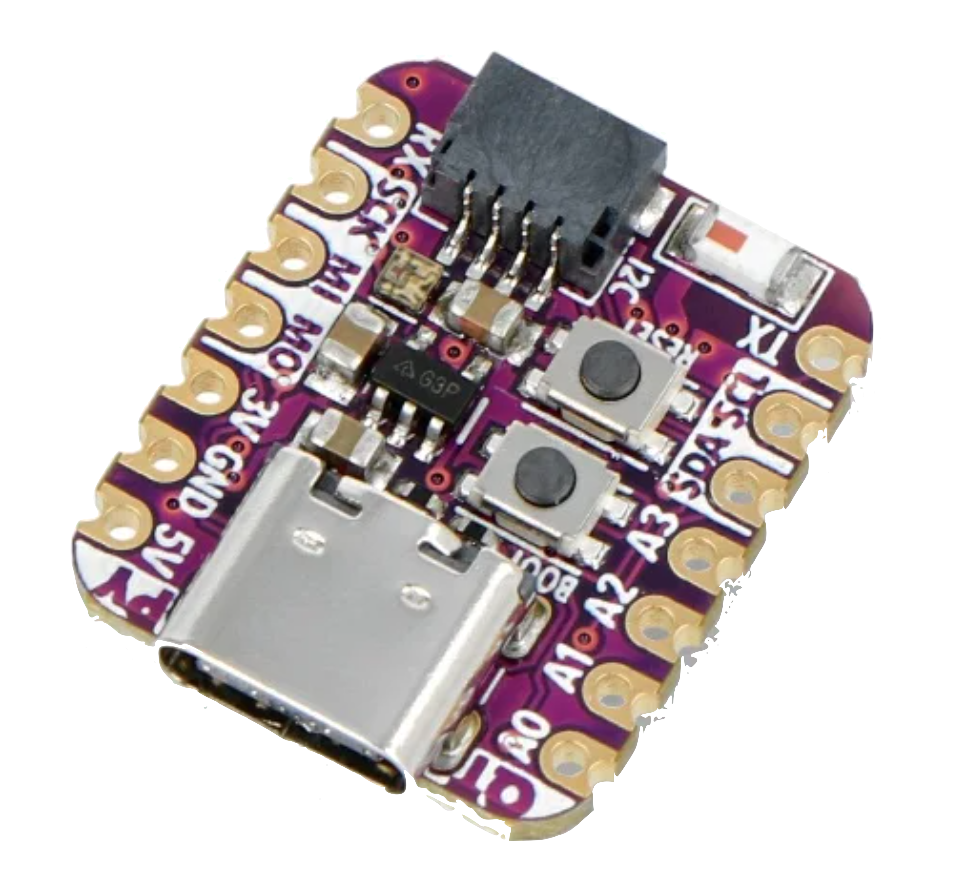
Lolin
C3 Mini |
esp32/lolin_c3mini |
1 button |
Product guide |
Lolin
C3 Pico |
esp32/lolin_c3pico |
Neopixel, 1 button |
Product guide |
ESP32-C6 has the following features:
- 160 MHz RISC-V MCU
- Wi-Fi
- BLE
- 512 KB RAM
- 4 MB flash on popular modules
The Moddable SDK supports three ESP32-C6 development kits:
| Name |
Platform identifier |
Key features |
Links |
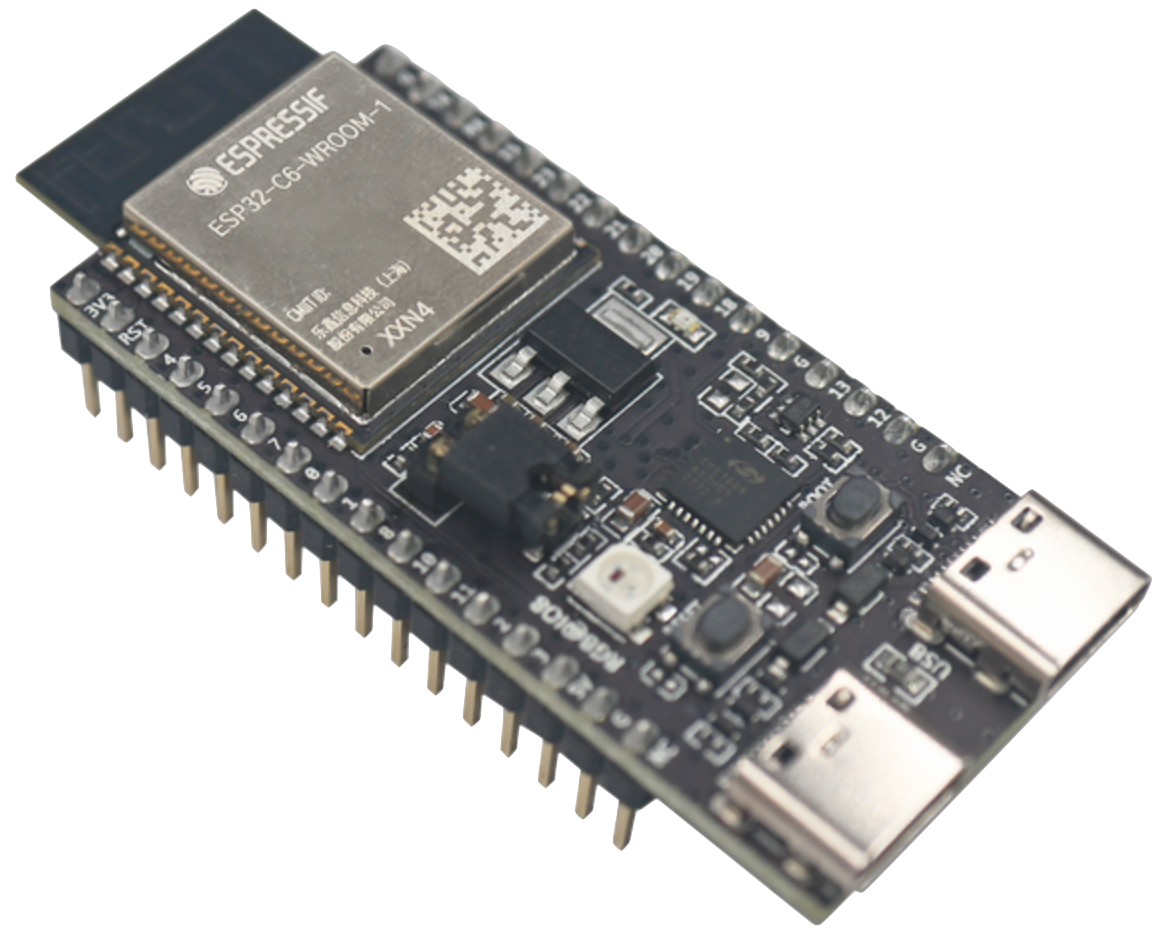
ESP32-C6-DevKitC-1 |
esp32/esp32c6 |
NeoPixel, Button |
Product page |
ESP32-H2 has the following features:
- 96 MHz RISC-V MCU
- BLE
- 320 KB RAM
- 4 MB flash on popular modules
The Moddable SDK supports three ESP32-H2 development kits:
| Name |
Platform identifier |
Key features |
Links |
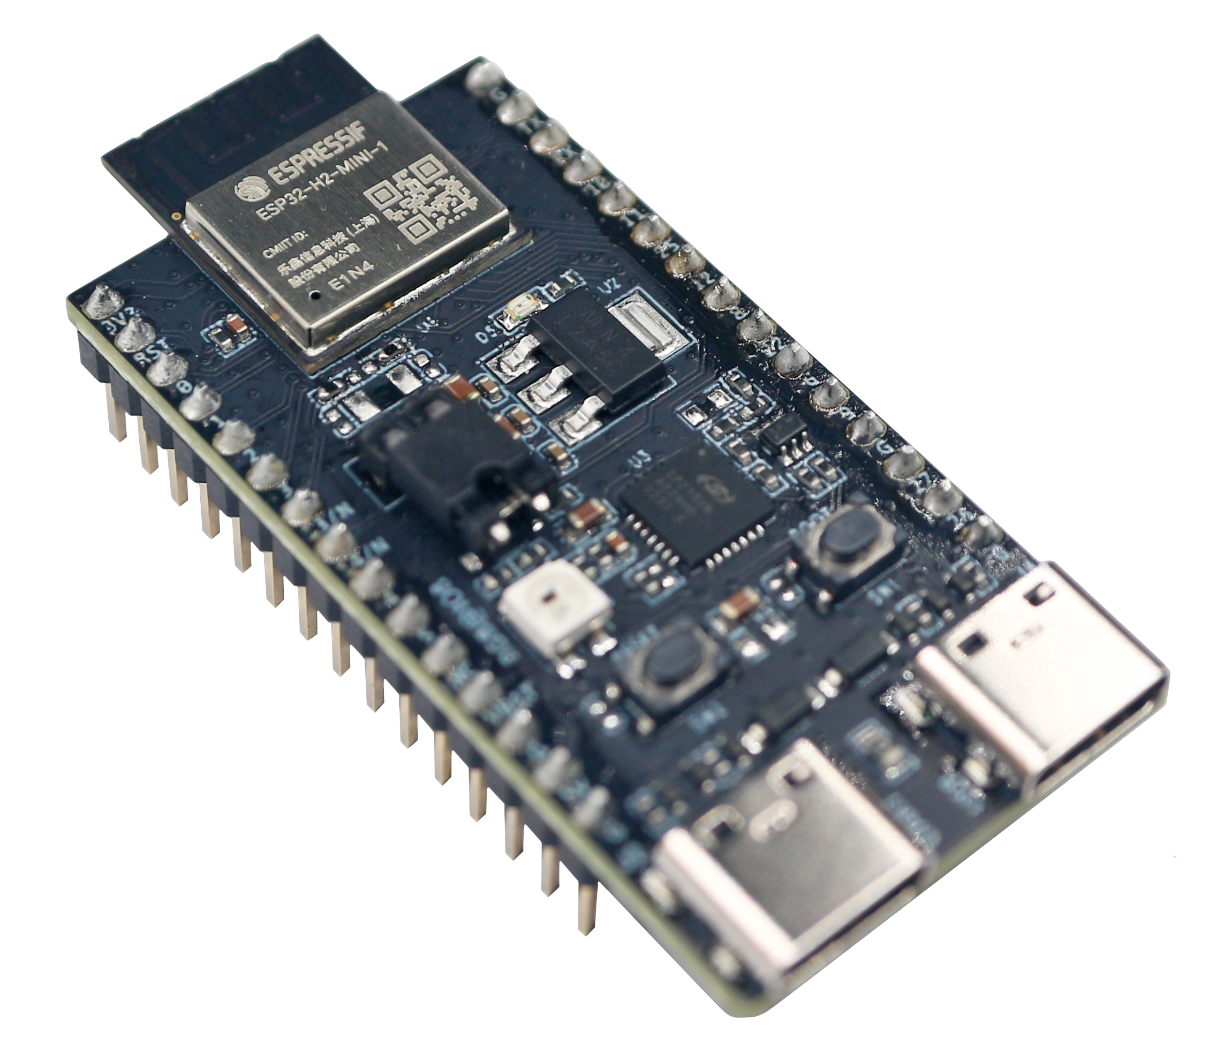
ESP32-H2-DevKitM-1 |
esp32/esp32h2 |
NeoPixel, Button |
Product page |
The target ESP32 subclass for a build is specified using the ESP32_SUBCLASS property in the build section of the manifest. This is usually set by the manifest for the target build device. The following example shows how to set the subclass to ESP32-S2.
"build":{
	"ESP32_SUBCLASS": "esp32s2"
},
ESP32_SUBCLASS |
Device |
esp32 or not set |
ESP32 |
esp32s2 |
ESP32-S2 |
esp32s3 |
ESP32-S3 |
esp32c3 |
ESP32-C3 |
esp32c6 |
ESP32-C6 |
esp32h2 |
ESP32-H2 |
The ESP32 supports three kinds of builds: debug, instrumented, and release. Each is appropriate for different stages in the product development process. You select which kind of build you want from the command line.
A debug build is used for debugging JavaScript. In a debug build, the ESP-IDF logging is disabled and the GDB stub is not present.
The -d option on the mcconfig command line selects a debug build.
A debug build is used for debugging native code. In an instrumented build, the ESP-IDF logging is enabled and the GDB stub is present. The JavaScript debugger is disabled. The instrumentation data usually available in xsbug is output to the serial console once a second.
The -i option on the mcconfig command line selects an instrumented build.
A release build is for production. In a release build, the ESP-IDF logging is disabled, the GDB stub is not present, the JavaScript debugger is disabled, instrumentation statistics are not collected, and serial console output is suppressed.
Omitting the -d and -i options on the mcconfig command line selects a release. Note that -r specifies rotation rather than selecting a release build.
The Moddable SDK build for ESP32 currently uses ESP-IDF v5.1.1 (commit e088c37) and the CMake option of Espressif's idf.py tool.
-
Install the Moddable SDK tools by following the instructions in the Getting Started document.
-
Create an esp32 directory in your home directory at ~/esp32 for required third party SDKs and tools.
-
If you are running macOS 10.15 (Catalina) or earlier, download and install the Silicon Labs CP210x USB to UART VCP driver.
If you run macOS Catalina, an extra step is required to enable the VCP driver. If you see a popup that says "System Extension Blocked" during installation, follow the instructions in the dialog to enable the extension in Security & Privacy System Preferences.
If you are using macOS 10.16 (Big Sur) or later, you do not need to install the VCP driver.
-
If this is your first install, clone the ESP-IDF GitHub repository into your ~/esp32 directory. Make sure to specify the --recursive option. Be sure to checkout the v5.1.1 tag:
cd ~/esp32
git clone -b v5.1.1 --recursive https://github.com/espressif/esp-idf.git esp-idf-v5.1.1
-
(Optional) Update homebrew and then install Python, cmake, ninja, the pip package management system, and pyserial. Also run a brew upgrade on those packages, in case you already had older versions installed:
brew update
brew install python3 cmake ninja dfu-util
brew upgrade python3 cmake ninja dfu-util
pip install pyserial
-
Connect the ESP32 device to your macOS host with a USB cable.
-
Open your shell startup/initialization file.
For macOS Mojave and earlier, the default shell is bash, so you should open ~/.profile.
open ~/.profile
Starting with macOS Catalina, the default shell is zsh, so you should open ~/.zshrc.
open ~/.zshrc
-
Add the following line to the file you just opened and save. This sets the IDF_PATH environment variable to point at your ESP-IDF directory.
export IDF_PATH=$HOME/esp32/esp-idf-v5.1.1
There is one optional environment variables for advanced users: UPLOAD_PORT.
The ESP-IDF build/config tool idf.py automatically detects the serial port in most cases. If it does not, set the path of the port to use in the UPLOAD_PORT environment variable.
export UPLOAD_PORT=/dev/cu.SLAB_USBtoUART
To identify the proper serial port, examine the list of serial devices in macOS before and after plugging in your ESP32 device and note the new serial port that shows up. To see a list of serial device files, use the following command in Terminal:
ls /dev/cu.*
The UPLOAD_PORT can also be specified on the mcconfig command line, which is useful when deploying to multiple ESP32 devices.
UPLOAD_PORT=/dev/cu.SLAB_USBtoUART mcconfig -d -m -p esp32
-
Adding the export statements to your ~/.profile or ~/.zshrc does not update the environment variables in active shell instances, so open a new shell instance (by opening a new tab/window) or manually run the export statement in your shell before proceeding.
-
Run the ESP-IDF install script. This will install the proper cross-compilation toolchain and utilities needed for the ESP-IDF build.
cd $IDF_PATH
./install.sh
If you are using a Mac with an M1 chip, you will have to take some additional steps before you can run the install script because the ESP-IDF does not yet have proper support for Darwin-arm64 hosts. This comment provides step by step instructions that you can follow to work around this issue.
-
Set up your build environment by sourcing the ESP-IDF export.sh script. This must be run every time you open a new shell instance, either manually or by a startup script.
source $IDF_PATH/export.sh
If you prefer to automate this process for new shell instances, follow the instructions from Steps 7-9 above and add the source command at the end of your shell startup/initialization script. Make sure it is after the export IDF_PATH command.
-
Verify the setup by building helloworld for your device target:
cd ${MODDABLE}/examples/helloworld
mcconfig -d -m -p esp32/<YOUR_SUBPLATFORM_HERE>
Note that the first time you build an application for the ESP32 target, the toolchain may prompt you to enter configuration options. If this happens, accept the defaults.
When you're trying to install applications, you may experience roadblocks in the form of errors or warnings; this section explains some common issues on macOS and how to resolve them.
For other issues that are common on macOS, Windows, and Linux, see the Troubleshooting section at the bottom of this document.
The following error messages mean that the device is not connected to your computer or the computer doesn't recognize the device.
error: cannot access /dev/cu.SLAB_USBtoUART
error: cannot access /dev/usbserial-0001
There are a few reasons this can happen:
- Your device is not plugged into your computer. Make sure it's plugged in when you run the build commands.
- You have a USB cable that is power only. Make sure you're using a data sync-capable USB cable.
- The computer does not recognize your device. To fix this problem, follow the instructions below.
Unplug the device and enter the following command.
ls /dev/cu*
Then plug in the device and repeat the same command. If nothing new appears in the terminal output, the device isn't being recognized by your computer.
If you are running macOS 10.15 or earlier, make sure you have the correct VCP driver installed. If you are running macOS 10.16 or earlier, you do not need to install the VCP driver.
If it is recognized, you now have the device name and you need to edit the UPLOAD_PORT environment variable. Enter the following command, replacing /dev/cu.SLAB_USBtoUART with the name of the device on your system.
export UPLOAD_PORT=/dev/cu.SLAB_USBtoUART
Espressif is encouraging moving to Python 3 as 2.7 is not recommended.
However, if you are using Python 2.7 and encounter SSL certificate errors while building the ESP-IDF, you may need to install Python 2.7 and the required packages manually. We've used brew and pip to install the additional components:
brew install python
brew install python@2
pip install future
pip install pyserial
pip install cryptography
This is a substantial update. We have found it best to start with a clean clone.
-
If you have the disk space, you may want to back up your old ESP-IDF.
cd ~/esp32/
mv esp-idf esp-idf.old
-
Remove the directory and clone the repository.
cd ~/esp32
rm -rf esp-idf
git clone -b v5.1.1 --recursive https://github.com/espressif/esp-idf.git
-
(Optional - you probably don't have to do this.) Update homebrew and then verify that you have all the necessary tools and that they are up to date:
brew update
brew install python cmake ninja
brew upgrade python cmake ninja
pip install pyserial
-
Verify the IDF_PATH environment variable is set correctly in your shell's user profile file (e.g. ~/.profile or ~/.zshrc, depending on your shell).
export IDF_PATH=$HOME/esp32/esp-idf
-
Run the ESP-IDF install script. This will install the proper cross-compilation toolchain and utilities needed for the ESP-IDF build.
cd $IDF_PATH
./install.sh
-
Set up your build environment by sourcing the ESP-IDF export.sh script. This must be run every time you open a new shell instance, either manually or by a startup script.
source $IDF_PATH/export.sh
If you prefer to automate this process for new shell instances, follow the instructions from Step 3 above and add the source command at the end of your shell startup/initialization script. Make sure it is after the export IDF_PATH command.
The Moddable SDK build for ESP32 currently uses ESP-IDF v5.1.1 (commit e088c37) and the CMake option of Espressif's idf.py tool.
-
Install the Moddable SDK tools by following the instructions in the Getting Started document.
-
Download and install the Silicon Labs CP210x USB to UART VCP driver. The driver zip file contains x64 and x86 versions of the installer. Most modern PCs run 64-bit Windows and should use the x64 version of the VCP driver. If you run a 32-bit version of Windows, use the x86 version of the driver. (You can determine if your computer is running a 64-bit version of Windows by checking "About your PC" in System Settings.)
-
Download and run the Espressif ESP-IDF Windows Installer. This will install the ESP32 Xtensa gcc toolchain, Ninja Build, OpenOCD, and a KConfig Frontend. This tool will also set your PATH to include the newly downloaded tools, as necessary.
It is safe to accept all of the default options in the installer, or to change install locations as necessary.
If you do not already have CMake or Python, the installer will also prompt you to download and install those tools (you should do so if needed).
The installer will offer to clone the ESP-IDF git repository for you. If you choose this option, select the "v5.1.1(release version)" option and clone into a directory called esp32\esp-idf within your home folder.
-
If you did not clone the ESP-IDF using the ESP-IDF Windows Installer, create an esp32 directory in your home folder, either from File Explorer or a Command Prompt:
cd %USERPROFILE%
mkdir esp32
-
If you did not clone the ESP-IDF using the ESP-IDF Windows Installer, clone the ESP-IDF Github repository into your ~/esp32 directory. Make sure to specify the --recursive option. Then checkout the v5.1.1 tag:
cd %USERPROFILE%\esp32
git clone -b v5.1.1 --recursive https://github.com/espressif/esp-idf.git
If you already have a cloned copy of the ESP-IDF, the simplest way to do the update is to delete the existing esp-idf folder and clone it again. See Espressif's Get ESP-IDF
-
Connect the ESP32 device to your Windows host with a USB cable.
-
Open the "Environment Variables" dialog of the Control Panel app by following these instructions. From that dialog:
- Create a User Variable called
IDF_PATH and set it to the directory where you cloned the ESP-IDF, e.g.:
- Variable name:
IDF_PATH
- Variable value (Use the "Browse Directory..." button to make this selection):
C:\Users\<user>\esp32\esp-idf
There is one optional environment variable for advanced users: UPLOAD_PORT.
The ESP-IDF build/config tool idf.py automatically detects the serial port in most cases. If it does not, set the path of the port to use in the UPLOAD_PORT environment variable following the same procedure as above.
-
UPLOAD_PORT: the COM port for your device, e.g. COM3
To identify the correct serial port, launch the Windows Device Manager. Open the "Ports (COM & LPT)" section, verify the "Silicon Labs CP210x USB to UART Bridge" is displayed, and note the associated COM port (e.g. COM3).
-
Newly-set environment variables will not take effect in existing Command Prompt instances, so be sure to open a new Command Prompt instance after applying these changes.
-
Run the ESP-IDF install batch file. This will configure utilities used by the ESP-IDF build for your machine.
cd %IDF_PATH%
install.bat
-
The ESP-IDF Windows Installer provides a command prompt called "ESP-IDF 5.1.1 CMD" that automatically sets important environment variables and paths. We recommend building ESP32 projects with "ESP-IDF 5.1.1 CMD." In each new command prompt instance you will need to run the Visual Studio x86 initialization batch file manually. Adjust the path as necessary for your system.
"C:\Program Files\Microsoft Visual Studio\2022\Community\VC\Auxiliary\Build\vcvars32.bat"
Note for experts: If you are comfortable editing Windows shortcuts, a convenient alternative to this manual process is to modify the "ESP-IDF 5.1.1 CMD" shortcut to initialize both the ESP-IDF environment and the Visual Studio x86 environment. To do this, right-click the "ESP-IDF 5.1.1 CMD" shortcut and select "Properties." In the "Target" field of the Properties window, you should see a command that looks like:
C:\WINDOWS\system32\cmd.exe /k "C:\Users\<username>\.espressif\idf_cmd_init.bat"
You can change the Target to include the path to vcvars32.bat as follows. Adjust the paths as necessary for your system.
%comspec% /k ""%ProgramFiles%\Microsoft Visual Studio\2022\Community\VC\Auxiliary\Build\vcvars32.bat" && pushd %IDF_PATH% && "%IDF_TOOLS_PATH%\idf_cmd_init.bat" && popd"
It is also convenient to update the "Start in" field of the shortcut to %MODDABLE% to start your Command Prompt session in the Moddable SDK directory.
Note: These instructions assume you only have one copy of the ESP-IDF installed. idf_cmd_init.bat can also take an argument to specify a particular ESP-IDF installation, if necessary. This argument should be set up in the default "ESP-IDF 5.1.1 CMD" shortcut.
-
In the "ESP-IDF 5.1.1 CMD" command prompt, verify the setup by building helloworld for your device target:
cd %MODDABLE%\examples\helloworld
mcconfig -d -m -p esp32/<YOUR_SUBPLATFORM_HERE>
When you're trying to install applications, you may experience roadblocks in the form of errors or warnings; this section explains some common issues on Windows and how to resolve them.
For other issues that are common on macOS, Windows, and Linux, see the Troubleshooting section at the bottom of this document.
The built-in anti-virus software included with Windows 10 and 11 (Microsoft Defender, formerly Windows Defender) can significantly slow down ESP-IDF builds. Espressif's ESP-IDF Windows Installer includes an option to automatically configure Microsoft Defender with all the exclusions needed to bypass realtime scanning during builds. If your build is slow, try re-running the ESP-IDF Windows Installer to verify that that option is selected. You may also need to manually exclude your Moddable build folder or other custom build output directories by following these instructions.
Espressif recommends using Python 3.9 or later when building with ESP-IDF v5.1.1. Python 3.9 will be installed by the ESP-IDF Windows Installer.
If you had a previous version of Python (such as Python 2.7) installed on your system, you may need to remove it from the System PATH so that Python 3.9 is chosen by default. Look for entries like C:\Python27\ or C:\Python27\Scripts\ in your PATH and remove them if you encounter Python errors during the build process.
If you get an error about Python dependencies not being installed, it means that the ESP-IDF installer failed to update Python. This usually happens due to permissions issues on your machine. To correct it, run python -m pip install -r %IDF_PATH%\requirements.txt from the "x86 Native Tools Command Prompt for VS 2022."
If a device is not connected, or the UPLOAD_PORT isn't set to the proper COM port, a number of error messages may appear after building. An error message similar to the following means that the device is not connected to your computer or the computer doesn't recognize the device. Note the could not open port 'COM3' message.
raise SerialException("could not open port {!r}: {!r}".format(self.portstr, ctypes.WinError()))
serial.serialutil.SerialException: could not open port 'COM3': FileNotFoundError(2, 'The system cannot find the file specified.', None, 2)
There are a few reasons this can happen:
- Your device is not plugged into your computer. Make sure it's plugged in when you run the build commands.
- You have a USB cable that is power only. Make sure you're using a data sync-capable USB cable.
- The computer does not recognize your device. To fix this problem, follow the instructions below.
Check the list of USB devices in Device Manager. If your device shows up as an unknown device, make sure you have the correct VCP driver installed.
If your device shows up on a COM port other than COM3, you need to edit the UPLOAD_PORT environment variable. Enter the following command, replacing COM3 with the appropriate device COM port for your system.
set UPLOAD_PORT=COM5
Many ESP32 errors on Windows can be corrected by updating the Espressif tools. This is especially true of errors reported during initialization of the "ESP-IDF CMD" Command Prompt and Python version errors during builds.
To update the Espressif tools, download and run the most recent ESP-IDF Windows Installer. Do not use the tool to clone a new ESP-IDF tree if you already have one installed. Instead, choose the option to use an existing ESP-IDF tree and point it to %IDF_PATH%.
To ensure that your build environment is up to date, perform the following steps:
-
Download and run the Espressif ESP-IDF Windows Installer. This will update the ESP32 Xtensa gcc toolchain, Ninja Build, OpenOCD, and a KConfig Frontend. This tool will also set your PATH to include the newly downloaded tools, as necessary.
It is safe to accept all of the default options in the installer, or to change install locations as necessary.
If you do not already have CMake or Python, the installer will also prompt you to download and install those tools (you should do so if needed).
If you choose to clone the ESP-IDF, select the v5.1.1 (release version) of the esp-idf.
If you use the installer to clone the ESP-IDF, please follow the instructions in the next step to update to the v5.1.1 tag.
-
If you did not clone the ESP-IDF using the ESP-IDF Windows Installer, clone the ESP-IDF Github repository into your ~/esp32 directory. Make sure to specify the --recursive option and branch v5.1.1 tag:
cd %USERPROFILE%\esp32
git clone -b v5.1.1 --recursive https://github.com/espressif/esp-idf.git
-
Open the "Environment Variables" dialog of the Control Panel app by following these instructions. From that dialog, verify the IDF_PATH Windows environment variable is set correctly.
-
IDF_PATH should have the value C:\Users\<user>\esp32\esp-idf
-
Run the ESP-IDF install batch file. This will configure utilities used by the ESP-IDF build for your machine.
cd %IDF_PATH%
install.bat
-
The ESP-IDF Windows Installer provides a command prompt called "ESP-IDF 5.1 CMD" that automatically sets important environment variables and paths. We recommend building ESP32 projects using "ESP-IDF 5.1 CMD." In each new command prompt instance you will need to run the Visual Studio x86 initialization batch file manually. Adjust the path as necessary for your system.
"C:\Program Files\Microsoft Visual Studio\2022\Community\VC\Auxiliary\Build\vcvars32.bat"
Note for experts: If you are comfortable editing Windows shortcuts, a convenient alternative to this manual process is to modify the "ESP-IDF 5.1 CMD" shortcut to initialize both the ESP-IDF environment and the Visual Studio x86 environment. To do this, right-click the "ESP-IDF 5.1 CMD" shortcut and select "Properties." In the "Target" field of the Properties window, you should see a command that looks like:
C:\WINDOWS\system32\cmd.exe /k "C:\Users\<username>\.espressif\idf_cmd_init.bat"
You can change the Target to include the path to vcvars32.bat as follows. Adjust the paths as necessary for your system.
%comspec% /k ""%ProgramFiles%\Microsoft Visual Studio\2022\Community\VC\Auxiliary\Build\vcvars32.bat" && pushd %IDF_PATH% && "%IDF_TOOLS_PATH%\idf_cmd_init.bat" && popd"
It is also convenient to update the "Start in" field of the shortcut to %MODDABLE% to start your Command Prompt session in the Moddable SDK directory.
Note: These instructions assume you only have one copy of the ESP-IDF installed. idf_cmd_init.bat can also take an argument to specify a particular ESP-IDF installation, if necessary. This argument should be set up in the default "ESP-IDF 5.1 CMD" shortcut.
-
In the "ESP-IDF 5.1 CMD" command prompt, verify the setup by building helloworld for your device target:
cd %MODDABLE%\examples\helloworld
mcconfig -d -m -p esp32/<YOUR_SUBPLATFORM_HERE>
The Moddable SDK build for ESP32 currently uses ESP-IDF v5.1.1 (commit e088c37) and the CMake option of Espressif's idf.py tool.
-
Install the Moddable SDK tools by following the instructions in the Getting Started document.
-
Install the packages required to compile with the ESP-IDF.
For Ubuntu 20.04 or newer (and other Linux distributions that default to Python 3):
sudo apt-get update
sudo apt-get install git wget flex bison gperf python-is-python3 python3-pip python3-serial python-setuptools cmake ninja-build ccache libffi-dev libssl-dev dfu-util
For Ubuntu prior to 20.04 (and other Linux distributions that default to Python 2):
sudo apt-get update
sudo apt-get install git wget flex bison gperf python python-pip python-setuptools python-serial cmake ninja-build ccache libffi-dev libssl-dev dfu-util
Note: The ESP-IDF build recommends Python 3 and will soon stop supporting Python 2.7. If your distribution uses Python 2.7 by default, you can explicitly install Python 3 and set it as the default Python interpreter with these commands. Note that this is a system-wide change that will impact other applications that use Python.
sudo apt-get install python3 python3-pip python3-setuptools
sudo update-alternatives --install /usr/bin/python python /usr/bin/python3 10
-
Create an esp32 directory in your home directory at ~/esp32 for required third party SDKs and tools.
-
If this is your first install, clone the ESP-IDF GitHub repository into your ~/esp32 directory. Make sure to specify the --recursive option. Then checkout the v5.1.1 tag:
cd ~/esp32
git clone -b v5.1.1 --recursive https://github.com/espressif/esp-idf.git esp-idf-v5.1.1
```
<!--
If you already have a clone of the ESP-IDF, update to the `v5.1.1` tag by using the [update instructions below](#lin-update).

```text
cd ~/esp32/esp-idf
git fetch --all --tags
git checkout v5.1.1
git submodule update --init --recursive
```
-->
-
Connect the ESP32 device to your Linux host with a USB cable.
-
Open your shell startup/initialization file (e.g. ~/.bash_profile or ~/.zshrc, depending on your shell), add the following line to the file, and save. This sets the IDF_PATH environment variable to point at your ESP-IDF directory.
export IDF_PATH=$HOME/esp32/esp-idf
There is an optional environment variable for advanced users: UPLOAD_PORT.
The ESP-IDF build/config tool idf.py automatically detects the serial port in most cases. If it does not, set the path of the port to use in the UPLOAD_PORT environment variable.
export UPLOAD_PORT=/dev/ttyUSB0
To identify the proper serial port, examine the list of serial devices on your Linux host before and after plugging in your ESP32 device and note the new serial port that shows up. To see a list of serial device files, use the following command:
ls /dev/*
The UPLOAD_PORT can also be specified on the mcconfig command line, which is useful when deploying to multiple ESP32 devices.
UPLOAD_PORT=/dev/ttyUSB0 mcconfig -d -m -p esp32
-
Adding the export statements to your shell startup file does not update the environment variables in active shell instances, so open a new shell instance (by opening a new tab/window) or manually run the export statements in your shell before proceeding.
-
Run the ESP-IDF install script. This will install the proper cross-compilation toolchain and utilities needed for the ESP-IDF build.
cd $IDF_PATH
./install.sh
-
Set up your build environment by sourcing the ESP-IDF export.sh script. This must be run every time you open a new shell instance, either manually or by a startup script.
source $IDF_PATH/export.sh
If you prefer to automate this process for new shell instances, follow the instructions from Steps 6-7 above and add the source command at the end of your shell startup/initialization script. Make sure it is after the export IDF_PATH command.
-
Verify the setup by building helloworld for your device target:
cd $MODDABLE/examples/helloworld
mcconfig -d -m -p esp32/<YOUR_SUBPLATFORM_HERE>
Note that the first time you build an application for the ESP32 target, the toolchain may prompt you to enter configuration options. If this happens, accept the defaults.
When you're trying to install applications, you may experience roadblocks in the form of errors or warnings; this section explains some common issues on Linux and how to resolve them.
For other issues that are common on macOS, Windows, and Linux, see the Troubleshooting section at the bottom of this document.
The ESP32 communicates with the Linux host via the ttyUSB0 device. On Ubuntu Linux the ttyUSB0 device is owned by the dialout group. If you get a permission denied error when flashing the ESP32, add your user to the dialout group:
sudo adduser <username> dialout
sudo reboot
The following error messages mean that the device is not connected to your computer or the computer doesn't recognize the device.
error: cannot access /dev/ttyUSB0
There are a few reasons this can happen:
- Your device is not plugged into your computer. Make sure it's plugged in when you run the build commands.
- You have a USB cable that is power only. Make sure you're using a data sync-capable USB cable.
- The computer does not recognize your device. To fix this problem, follow the instructions below.
Unplug the device and enter the following command.
ls /dev/cu*
Then plug in the device and repeat the same command. If nothing new appears in the terminal output, the device isn't being recognized by your computer.
If it is recognized, you now have the device name and you need to edit the UPLOAD_PORT environment variable. Enter the following command, replacing /dev/ttyUSB1 with the name of the device on your system.
export UPLOAD_PORT=/dev/ttyUSB1
This is a substantial update. We have found it best to start with a clean clone.
-
If you have the disk space, you may want to back up your old ESP-IDF.
cd ~/esp32/
mv esp-idf esp-idf.old
-
Remove the directory and clone the repository.
cd ~/esp32
rm -rf esp-idf
git clone -b v5.1.1 --recursive https://github.com/espressif/esp-idf.git
-
(optional) Update apt, then install any missing packages (and upgrade existing packages) required to compile with the ESP-IDF. The packages to install vary based on your distribution's default Python version.
For Ubuntu 20.04 or newer (and other Linux distributions that default to Python 3):
sudo apt-get update
sudo apt-get install git wget flex bison gperf python-is-python3 python3-pip python3-serial python-setuptools cmake ninja-build ccache libffi-dev libssl-dev dfu-util
For Ubuntu prior to 20.04 (and other Linux distributions that default to Python 2):
sudo apt-get update
sudo apt-get install git wget flex bison gperf python python-pip python-setuptools python-serial cmake ninja-build ccache libffi-dev libssl-dev dfu-util
Note: The ESP-IDF build recommends Python 3. If your distribution uses Python 2.7 by default, you can explicitly install Python 3 and set it as the default Python interpreter with these commands. Note that this is a system-wide change that will impact other applications that use Python.
sudo apt-get install python3 python3-pip python3-setuptools
sudo update-alternatives --install /usr/bin/python python /usr/bin/python3 10
-
Verify the IDF_PATH environment variable is set correctly in your shell's user profile file (e.g. ~/.bash_profile or ~/.zshrc, depending on your shell).
export IDF_PATH=$HOME/esp32/esp-idf
-
Run the ESP-IDF install script. This will install the proper cross-compilation toolchain and utilities needed for the ESP-IDF build.
cd $IDF_PATH
./install.sh
-
Set up your build environment by sourcing the ESP-IDF export.sh script. This must be run every time you open a new shell instance, either manually or by a startup script.
source $IDF_PATH/export.sh
If you prefer to automate this process for new shell instances, follow the instructions from Step 3 above and add the source command at the end of your shell startup/initialization script. Make sure it is after the export IDF_PATH command.
-
If you have existing ESP32 build output in $MODDABLE/build/bin/esp32 or $MODDABLE/build/tmp/esp32, delete those directories:
cd $MODDABLE/build
rm -rf bin/esp32
rm -rf tmp/esp32
-
Verify the setup by building helloworld for your device target:
cd $MODDABLE/examples/helloworld
mcconfig -d -m -p esp32/<YOUR_SUBPLATFORM_HERE>
Note that the first time you build an application for the ESP32 target, the toolchain may prompt you to enter configuration options. If this happens, accept the defaults.
When you're trying to install applications, you may experience roadblocks in the form of errors or warnings; this section explains some common issues and how to resolve them.
The following warning message is normal and is no cause for concern.
warning: serialport_set_baudrate: baud rate 921600 may not work
However, sometimes the upload starts but does not complete. You can tell an upload is complete after the progress bar traced to the console goes to 100%. For example:
........................................................... [ 16% ]
........................................................... [ 33% ]
........................................................... [ 49% ]
........................................................... [ 66% ]
........................................................... [ 82% ]
........................................................... [ 99% ]
..                                                         [ 100% ]
There are a few reasons the upload may fail partway through:
- You have a faulty USB cable.
- You have a USB cable that does not support higher baud rates.
- You're using a board that requires a lower baud rate than the default baud rate that the Moddable SDK uses.
To solve the last two problems above, you can change to a slower baud rate as follows:
-
Open $MODDABLE/tools/mcconfig/make.esp32.mk.
-
Find this line, which sets the upload speed to 921600:
UPLOAD_SPEED ?= 921600
-
Set the speed to a smaller number. For example:
UPLOAD_SPEED ?= 115200
Note: Instead of modifying the make.esp32.mk file, you can make a temporary change by setting the environment variable UPLOAD_SPEED.
If an ESP32 is not in bootloader mode, you cannot flash the device. Most development boards built with the ESP32 include circuitry that automatically puts them into bootloader mode when you try to reflash the board. Some do not, and sometimes the auto programming will fail. This is most common on Windows machines.
When your ESP32 is not in bootloader mode, status messages stop being traced briefly when you attempt to flash the device, and after several seconds this error message is traced to the console:
A fatal error occurred: Failed to connect to ESP32: Timed out waiting for packet header
To manually put your ESP32 into bootloader mode, follow these steps:
- Unplug the device.
- Hold down the BOOT button.
- Plug the device into your computer.
- Enter the
mcconfig command.
- Wait a few seconds and release the BOOT button.
Originally, programming and debugging with the ESP32 was done over a serial connection. Some devices contain an integrated serial-to-USB chip, and some use an external programmer.
In newer devices, Espressif has added USB support. Starting with the ESP32-S2, TinyUSB support was added. TinyUSB support continued with ESP32-S3.
Starting with the ESP32-S3 and ESP32-C3, support for USB was integrated into the device with a USB Serial/JTAG driver.
In a device's manifest.json file, the USE_USB build option specifies which USB implementation to use. The SDKCONFIGPATH is also specified to pick up the ESP-IDF config files specific to this device:
	"build": {
		"ESP32_SUBCLASS": "esp32s2",
		"USE_USB": "1",
		"SDKCONFIGPATH": "./sdkconfig"
		...
TinyUSB works with the ESP32-S2 and ESP32-S3 devices.
With TinyUSB, we need to set the UPLOAD_PORT. For example:
export UPLOAD_PORT=/dev/cu.usbmodem01
See the section for your build platform macOS, Windows, or Linux which describes how to find your device's UPLOAD_PORT.
Build your application:
mcconfig -d -m -p esp32/esp32s3_usb
Note: if your device is not in programming mode, there will be a notice in the build console:
# looking for UPLOAD_PORT: /dev/cu.usbmodem01
** Put device in programming mode **
When the console says Done, press the Reset button on the device.
Executing "ninja flash"...
Done
After you press Reset on the device, the device will restart and connect to xsbug.
These devices use this technique:
| Platform |
Device |
esp32/esp32s3_usb |
Espressif ESP32-S3-DevKitC |
esp32/m5atom_s3 |
M5 Atom S3 |
esp32/m5atom_s3_lite |
M5 Atom S3 Lite |
esp32/qtpys2 |
Adafruit QT Py S2 |
esp32/qtpys3 |
Adafruit QT Py S3 |
esp32/s2mini |
Lolin S2 mini |
esp32/s3_tft_feather |
Adafruit ESP32-S3 TFT Feather |
The built-in SERIAL-JTAG driver can be used with the ESP32-S3 and ESP32-C3 devices.
There is usually no need to set the UPLOAD_PORT, or press buttons on your device. However, if you have multiple devices connected simultaneously, you will have to use the UPLOAD_PORT to specify which one to use.
Build your application:
mcconfig -d -m -p esp32/esp32s3_cdc
These devices use this technique:
| Platform |
Device |
esp32/c3_devkit_rust |
Espressif C3 DevKit Rust |
esp32/esp32c3_cdc |
Espressif C3 DevKitM |
esp32/esp32s3_cdc |
Espressif ESP32-S3-DevKitC |
esp32/qtpyc3 |
Adafruit QT Py C3 |
esp32/xiao_esp32c3 |
Seeed Xiao ESP32C3 |